|
3rd Battalion Royal Australian Regiment
Your FaithfullyJapan - Korea - Malaya - Borneo - Vietnam - East Timor - Solomons - Iraq - Afghanistan |
3rd Battalion Royal Australian Regiment  Battlefield Korea |
||||||||||||||||||||||||||||||||||||||||||||||||||||||||||||||||||||||||||||||||||||||||||||||||||||||||||||||||||||||||||||||||||||||||||||||||||||||||||||||||||||||||||||||||||||||||||||||||||||||||||||||||||||||||||||||||||||||||||||||||||||||||||||||
1950 - 1951 |
||||||||||||||||||||||||||||||||||||||||||||||||||||||||||||||||||||||||||||||||||||||||||||||||||||||||||||||||||||||||||||||||||||||||||||||||||||||||||||||||||||||||||||||||||||||||||||||||||||||||||||||||||||||||||||||||||||||||||||||||||||||||||||||
Part 2 - Battle Honours |
||||||||||||||||||||||||||||||||||||||||||||||||||||||||||||||||||||||||||||||||||||||||||||||||||||||||||||||||||||||||||||||||||||||||||||||||||||||||||||||||||||||||||||||||||||||||||||||||||||||||||||||||||||||||||||||||||||||||||||||||||||||||||||||
 |
||||||||||||||||||||||||||||||||||||||||||||||||||||||||||||||||||||||||||||||||||||||||||||||||||||||||||||||||||||||||||||||||||||||||||||||||||||||||||||||||||||||||||||||||||||||||||||||||||||||||||||||||||||||||||||||||||||||||||||||||||||||||||||||
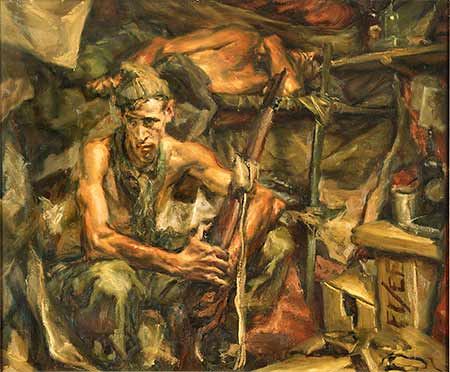
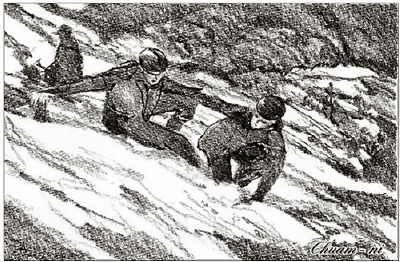
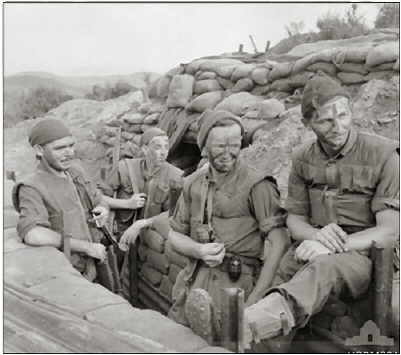
Inside of dug-out, Hill 210. Australian infantryman from 28 Brigade, 1 Battalion, 1st Commonwealth Division, without shirt and wearing a beanie, sitting in a dugout at Hill 210, Jamestown Line, Korea, during the 'static war' period. Artist Ivor Hele. Painting made South Australia, Aldinga, 1953, Medium oil on canvas. [AWM ART40306] ... |
||||||||||||||||||||||||||||||||||||||||||||||||||||||||||||||||||||||||||||||||||||||||||||||||||||||||||||||||||||||||||||||||||||||||||||||||||||||||||||||||||||||||||||||||||||||||||||||||||||||||||||||||||||||||||||||||||||||||||||||||||||||||||||||
 |
||||||||||||||||||||||||||||||||||||||||||||||||||||||||||||||||||||||||||||||||||||||||||||||||||||||||||||||||||||||||||||||||||||||||||||||||||||||||||||||||||||||||||||||||||||||||||||||||||||||||||||||||||||||||||||||||||||||||||||||||||||||||||||||
Battle Honours (Part Two) |
||||||||||||||||||||||||||||||||||||||||||||||||||||||||||||||||||||||||||||||||||||||||||||||||||||||||||||||||||||||||||||||||||||||||||||||||||||||||||||||||||||||||||||||||||||||||||||||||||||||||||||||||||||||||||||||||||||||||||||||||||||||||||||||
Contents |
||||||||||||||||||||||||||||||||||||||||||||||||||||||||||||||||||||||||||||||||||||||||||||||||||||||||||||||||||||||||||||||||||||||||||||||||||||||||||||||||||||||||||||||||||||||||||||||||||||||||||||||||||||||||||||||||||||||||||||||||||||||||||||||
|
||||||||||||||||||||||||||||||||||||||||||||||||||||||||||||||||||||||||||||||||||||||||||||||||||||||||||||||||||||||||||||||||||||||||||||||||||||||||||||||||||||||||||||||||||||||||||||||||||||||||||||||||||||||||||||||||||||||||||||||||||||||||||||||
| The actions that earned the
Royal Australian Regiment its battle honours. |
||||||||||||||||||||||||||||||||||||||||||||||||||||||||||||||||||||||||||||||||||||||||||||||||||||||||||||||||||||||||||||||||||||||||||||||||||||||||||||||||||||||||||||||||||||||||||||||||||||||||||||||||||||||||||||||||||||||||||||||||||||||||||||||
 |
||||||||||||||||||||||||||||||||||||||||||||||||||||||||||||||||||||||||||||||||||||||||||||||||||||||||||||||||||||||||||||||||||||||||||||||||||||||||||||||||||||||||||||||||||||||||||||||||||||||||||||||||||||||||||||||||||||||||||||||||||||||||||||||
The theatre honour, 'Korea 1950-53', emblazoned on the Regimental Colours, represents the sustained efforts of the Regiment throughout the Korean conflict.The Regiment took part in a number of phases of the Korean campaign: The United Nations counter-offensive: 16 September-1 November 1950 Withdrawal from the Yalu and the Chinese offensive: 1 November 1950-4 January 1951 The advance to the 38th Parallel: 25 January-16 April 1951 The Battle of the 38th Parallel: 22 April-30 May 1951 The Final Phase (Static): 1 June 1951-27 July 1953. |
||||||||||||||||||||||||||||||||||||||||||||||||||||||||||||||||||||||||||||||||||||||||||||||||||||||||||||||||||||||||||||||||||||||||||||||||||||||||||||||||||||||||||||||||||||||||||||||||||||||||||||||||||||||||||||||||||||||||||||||||||||||||||||||
 |
||||||||||||||||||||||||||||||||||||||||||||||||||||||||||||||||||||||||||||||||||||||||||||||||||||||||||||||||||||||||||||||||||||||||||||||||||||||||||||||||||||||||||||||||||||||||||||||||||||||||||||||||||||||||||||||||||||||||||||||||||||||||||||||
 |
||||||||||||||||||||||||||||||||||||||||||||||||||||||||||||||||||||||||||||||||||||||||||||||||||||||||||||||||||||||||||||||||||||||||||||||||||||||||||||||||||||||||||||||||||||||||||||||||||||||||||||||||||||||||||||||||||||||||||||||||||||||||||||||
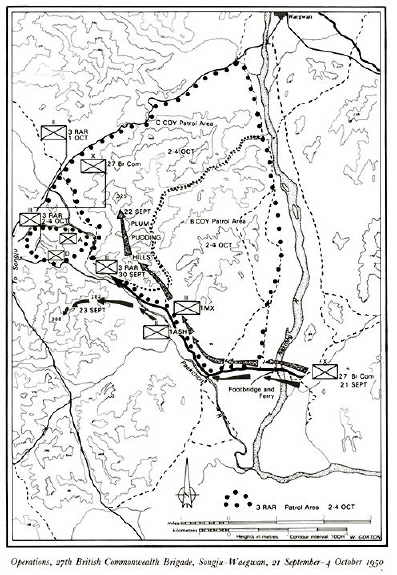
On 17 October 1950, 27 British Commonwealth Brigade was ordered to capture the town of Sariwon, thirty-four miles to the north of the position then reached by the United Nations (UN) forces. Mounted on tanks and in trucks, the brigade rushed forward. The Argylls brushed aside the enemy dug in on the southern approach with a copybook attack and deployed in and around the town. Having passed through Sariwon, 3 RAR advanced a further four miles across the undulating plain to the north-west and took up defensive positions as last light fell. It was soon very evident that the retreating North Koreans had no idea that UN troops were in the area as, all through the night and into the next day, the enemy kept stumbling into the brigade lines. Often friend and foe travelled side by side and many skirmishes resulted. On at least one occasion the brigade was mistaken for a Russian unit, with enemy soldiers approaching, oblivious to its true identity. About 1,500 prisoners of war were taken, complete with their equipment, when enemy soldiers were bluffed into thinking that they were surrounded. This contact was initiated when the North Koreans ran into the 3 RAR second-in-command who, with a small party of men, was waiting for ration trucks to move up to F Echelon. In total, 1,982 prisoners were taken by 3 RAR, the largest haul by any unit in the campaign. The confusion caused by the rapid UN advance is easily understood given that one 20-mile stretch of road alone contained these troops in this order: 7 US Cavalry Regiment, North Koreans, 3 RAR, North Koreans, main body of the Argylls, North Koreans and advanced elements of 24 US Infantry Division. |
||||||||||||||||||||||||||||||||||||||||||||||||||||||||||||||||||||||||||||||||||||||||||||||||||||||||||||||||||||||||||||||||||||||||||||||||||||||||||||||||||||||||||||||||||||||||||||||||||||||||||||||||||||||||||||||||||||||||||||||||||||||||||||||
 |
||||||||||||||||||||||||||||||||||||||||||||||||||||||||||||||||||||||||||||||||||||||||||||||||||||||||||||||||||||||||||||||||||||||||||||||||||||||||||||||||||||||||||||||||||||||||||||||||||||||||||||||||||||||||||||||||||||||||||||||||||||||||||||||
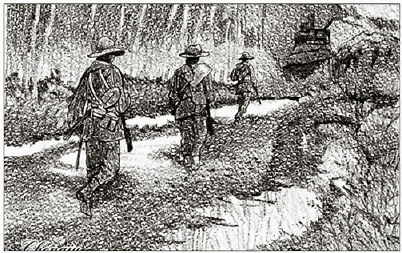
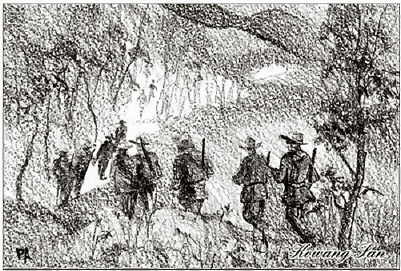
An infantry section accompanied by South Korean troops sets out on patrol. (AWM HOBJ 1411) |
||||||||||||||||||||||||||||||||||||||||||||||||||||||||||||||||||||||||||||||||||||||||||||||||||||||||||||||||||||||||||||||||||||||||||||||||||||||||||||||||||||||||||||||||||||||||||||||||||||||||||||||||||||||||||||||||||||||||||||||||||||||||||||||
|
||||||||||||||||||||||||||||||||||||||||||||||||||||||||||||||||||||||||||||||||||||||||||||||||||||||||||||||||||||||||||||||||||||||||||||||||||||||||||||||||||||||||||||||||||||||||||||||||||||||||||||||||||||||||||||||||||||||||||||||||||||||||||||||
 |
||||||||||||||||||||||||||||||||||||||||||||||||||||||||||||||||||||||||||||||||||||||||||||||||||||||||||||||||||||||||||||||||||||||||||||||||||||||||||||||||||||||||||||||||||||||||||||||||||||||||||||||||||||||||||||||||||||||||||||||||||||||||||||||
On 20 October 1950, 187 Airborne Regimental Combat Team dropped in advance of the UN spearheads to release a trainload of American prisoners and to cut the enemy retreat route up the west coast of Korea. The 27th British Commonwealth Brigade, at this time leading the 1 Corps advance, was ordered to link up with elements of 187 Airborne force moving south from Sukchon. Two days later, on 22 October at about 9.00 a.m., 3 RAR, which was leading the brigade, came under fire a mile north of Yongyu. A few minutes later the battalion was informed that 187 Airborne force was about a mile further north. The battalion then advanced to locate the Americans; C Company advanced in tanks towards the positions from which the enemy fire was coming. Close to the objective the C Company soldiers leapt out and engaged in a determined bayonet attack. In most instances the North Korean soldiers left their fire positions or pits and fled, suffering heavy casualties along the way. Artillery and mortars were not used as the exact location of the 187th Airborne troops was not known. Later the whole area had to be carefully cleared as enemy soldiers who had not fled would not surrender but lay low or sniped and had to be flushed out group by group, one by one. The Airborne Battalion then returned to Sukchon. Enemy casualties amounted to approximately 150 killed and 239 taken prisoner, while seven 3 RAR soldiers were wounded. |
||||||||||||||||||||||||||||||||||||||||||||||||||||||||||||||||||||||||||||||||||||||||||||||||||||||||||||||||||||||||||||||||||||||||||||||||||||||||||||||||||||||||||||||||||||||||||||||||||||||||||||||||||||||||||||||||||||||||||||||||||||||||||||||
 |
||||||||||||||||||||||||||||||||||||||||||||||||||||||||||||||||||||||||||||||||||||||||||||||||||||||||||||||||||||||||||||||||||||||||||||||||||||||||||||||||||||||||||||||||||||||||||||||||||||||||||||||||||||||||||||||||||||||||||||||||||||||||||||||
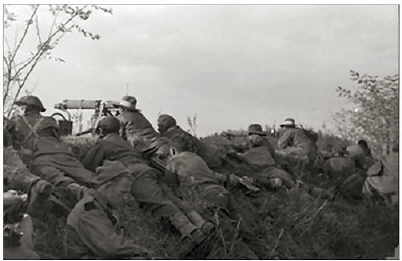
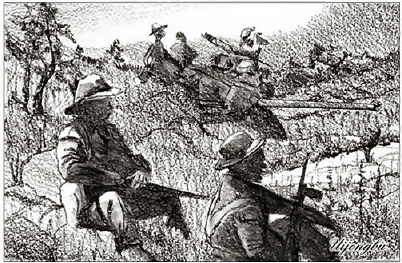
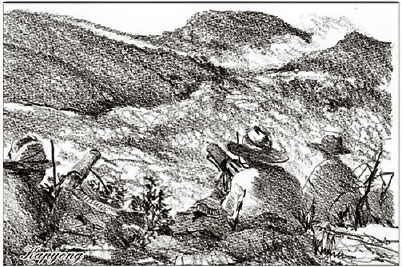
North Korea, October 1950.
Vickers machine-gunners from 3 RAR await a chance to fire on enemy targets from the crest of a hill. (AWM HOBJ1649) |
||||||||||||||||||||||||||||||||||||||||||||||||||||||||||||||||||||||||||||||||||||||||||||||||||||||||||||||||||||||||||||||||||||||||||||||||||||||||||||||||||||||||||||||||||||||||||||||||||||||||||||||||||||||||||||||||||||||||||||||||||||||||||||||
 |
||||||||||||||||||||||||||||||||||||||||||||||||||||||||||||||||||||||||||||||||||||||||||||||||||||||||||||||||||||||||||||||||||||||||||||||||||||||||||||||||||||||||||||||||||||||||||||||||||||||||||||||||||||||||||||||||||||||||||||||||||||||||||||||
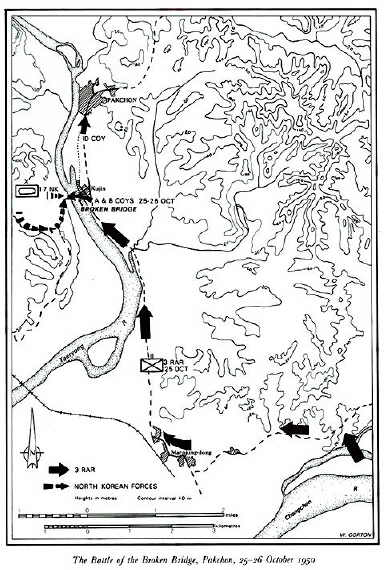
| Still leading the advance, 27 British Commonwealth Brigade reached the Chongchon River on 23 October 1950. The crossing was unopposed and, on 25 October, 3 RAR crossed the Taeryong River. After a series of short engagements, the battalion secured a bridgehead and linked up with the Argylls who had crossed further upstream on 26 October.
The mouth of the Taeryong River marks the point on the western coast where the Korean peninsula begins. North of this parallel Korea spreads out to meet the border of Manchuria and stretches north-east to Russia. On 27 October, the brigade continued the advance eastwards towards the mouth of the Yalu River. On 29 October, and just four miles short of the town of Chongju, 3 RAR took the lead. Late that morning spotter aircraft reported the enemy in strength on high ground across the line of advance. At 2.30 p.m. D Company commenced an attack against heavy resistance and one Sherman tank accompanying the infantry was hit. By 4.30 p.m. D Company had secured its objectives and A Company, supported by tanks, attacked the enemy entrenched to the north of the road. Again, determined resistance was met, but by 5.30 p.m., the objectives had been secured. B Company moved forward without opposition to a position astride the road between A and D companies. The battalion then dug in and awaited the expected counter-attacks. At 8.00 p.m. an attack developed against D Company and the enemy succeeded in moving to the rear of the forward platoon, although the position was quickly reversed by a two-platoon charge. During the action eleven Russian-made T34/55 tanks and two SU 76 self-propelled guns were destroyed. Of these, three were destroyed by A Company's 3.5-inch rocket launchers and the crew of another was killed by a D Company Bren gunner, the crew attempting to escape when the Bren set fire to the auxiliary petrol tanks. In all cases the tanks were very well camouflaged, as the ridge was thickly wooded with pine trees. The next morning over 150 enemy bodies were counted still lying around the battalion defensive positions. Total casualties sustained by 3 RAR amounted to nine killed and thirty wounded. On 30 October 3 RAR advanced to high ground overlooking Chongju. During this advance ten enemy stragglers were taken prisoner and twelve killed. At 3.00 p.m. the Argylls cleared the town without opposition and later the same day the brigade moved into the divisional reserve. Before 3 RAR left the forward area, six high velocity shells landed in the battalion headquarters area. The sixth struck a tree to the rear of C Company's position and a piece of metal seriously wounded the battalion's commanding officer. He was evacuated to the surgical hospital at Anju but later died of his wounds. |
||||||||||||||||||||||||||||||||||||||||||||||||||||||||||||||||||||||||||||||||||||||||||||||||||||||||||||||||||||||||||||||||||||||||||||||||||||||||||||||||||||||||||||||||||||||||||||||||||||||||||||||||||||||||||||||||||||||||||||||||||||||||||||||
|
||||||||||||||||||||||||||||||||||||||||||||||||||||||||||||||||||||||||||||||||||||||||||||||||||||||||||||||||||||||||||||||||||||||||||||||||||||||||||||||||||||||||||||||||||||||||||||||||||||||||||||||||||||||||||||||||||||||||||||||||||||||||||||||
 |
||||||||||||||||||||||||||||||||||||||||||||||||||||||||||||||||||||||||||||||||||||||||||||||||||||||||||||||||||||||||||||||||||||||||||||||||||||||||||||||||||||||||||||||||||||||||||||||||||||||||||||||||||||||||||||||||||||||||||||||||||||||||||||||
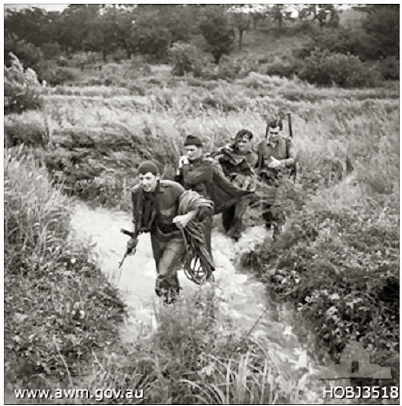
A rescue patrol crosses a creek as it heads towards no man's land in an effort to contact a fighting patrol. (AWM HOBJ3518)
|
||||||||||||||||||||||||||||||||||||||||||||||||||||||||||||||||||||||||||||||||||||||||||||||||||||||||||||||||||||||||||||||||||||||||||||||||||||||||||||||||||||||||||||||||||||||||||||||||||||||||||||||||||||||||||||||||||||||||||||||||||||||||||||||
 |
||||||||||||||||||||||||||||||||||||||||||||||||||||||||||||||||||||||||||||||||||||||||||||||||||||||||||||||||||||||||||||||||||||||||||||||||||||||||||||||||||||||||||||||||||||||||||||||||||||||||||||||||||||||||||||||||||||||||||||||||||||||||||||||
Following the capture of Chongju on 30 October 1950, 27 British Commonwealth Brigade had been withdrawn to the area of Pakchon, the scene of the action on 25/26 October. On 1 November the Chinese entered the war, forcing the South Korean and UN forces to withdraw. The 27th British Commonwealth Brigade was to join a rearguard defending the lower crossings of the Taeryong and Chongchon Rivers. Both 3 RAR and the Middlesex were in position around the town of Pakchon. The 24th US Infantry Division was further upstream on the brigade's right and, further to the right, were the South Koreans. During the night of 4/5 November, the Chinese and North Koreans pushed back a portion of the 24th US Infantry Division and turned west to advance between the Taeryong and Chongchon rivers threatening the rear of the brigade's two forward battalions. On 5 November the enemy attacked a US field artillery regiment in support of the brigade about four miles south of Pakchon. The Argylls moved up to assist and then attacked the enemy forces holding a hill which formed an effective roadblock, although they were unable to hold the position against the Chinese counter-attacks. Late on 5 November, 3 RAR attacked the enemy-held hill and, after a very hard five-hour fight balanced on precipitous slopes against superior numbers and despite heavy machine-gun and mortar fire, succeeded in capturing the objective. In the face of heavy counter-attacks the forward companies were ordered to withdraw but shortly afterwards were able to retake the position without opposition. During the attack 3 RAR had been supported by Mustangs from the RAAF's 77 Squadron. The next day 3 RAR was still on the hill and patrols were sent out to contact the enemy, although only light contact was made over the subsequent days. The first Chinese offensive had drawn to a close. During the battle of Pakchon, 3 RAR casualties totalled sixty-four wounded and twelve killed. |
||||||||||||||||||||||||||||||||||||||||||||||||||||||||||||||||||||||||||||||||||||||||||||||||||||||||||||||||||||||||||||||||||||||||||||||||||||||||||||||||||||||||||||||||||||||||||||||||||||||||||||||||||||||||||||||||||||||||||||||||||||||||||||||
 |
||||||||||||||||||||||||||||||||||||||||||||||||||||||||||||||||||||||||||||||||||||||||||||||||||||||||||||||||||||||||||||||||||||||||||||||||||||||||||||||||||||||||||||||||||||||||||||||||||||||||||||||||||||||||||||||||||||||||||||||||||||||||||||||
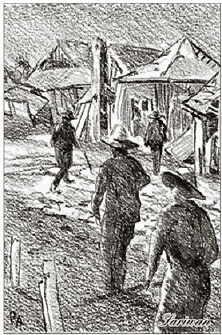
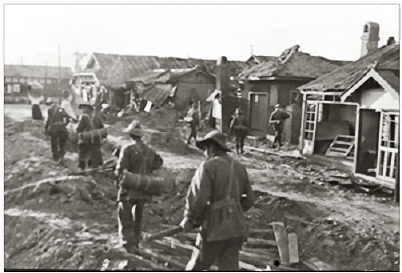
Pakchon, North Korea, 29 October 1950. Troops walk along a ruined road through war-torn Pakchon. (AWM HOBJ 1633)
|
||||||||||||||||||||||||||||||||||||||||||||||||||||||||||||||||||||||||||||||||||||||||||||||||||||||||||||||||||||||||||||||||||||||||||||||||||||||||||||||||||||||||||||||||||||||||||||||||||||||||||||||||||||||||||||||||||||||||||||||||||||||||||||||
 |
||||||||||||||||||||||||||||||||||||||||||||||||||||||||||||||||||||||||||||||||||||||||||||||||||||||||||||||||||||||||||||||||||||||||||||||||||||||||||||||||||||||||||||||||||||||||||||||||||||||||||||||||||||||||||||||||||||||||||||||||||||||||||||||
 |
||||||||||||||||||||||||||||||||||||||||||||||||||||||||||||||||||||||||||||||||||||||||||||||||||||||||||||||||||||||||||||||||||||||||||||||||||||||||||||||||||||||||||||||||||||||||||||||||||||||||||||||||||||||||||||||||||||||||||||||||||||||||||||||
| Having held the Pakchon perimeter from the end of the first Chinese offensive, 27 British Commonwealth Brigade moved south into corps reserve when the ill-fated 8th Army offensive began on 24 November 1950. Two days later the second Chinese offensive pushed the leading elements of the advancing UN forces aside and, by sweeping towards the west coast, threatened to cut off the major part of the 8th Army. At the end of the year the brigade conducted an orderly withdrawal to move more than 200 miles in nine days. At Uijongbu, just north of Seoul, the Middlesex and Argylls were presented with a Korean Presidential Citation for their defence of the Pakchon River line.
On 1 January 1951 the brigade moved six miles north to help cover the main withdrawal route. By nightfall 3 RAR was all but isolated by enemy advanced elements which kept the roads to the rear under fire. Brigade headquarters and Support Company received small arms fire from the village of Takchon thought to be held by troops from 6 Republic of Korea (ROK) Division. At 3.00 p.m., 3 RAR was ordered to withdraw on transport to a roadblock position in the rear of the brigade. The 'O' group came under fire from both sides of the road a mile south of Takchon, but the decision was taken to run the gauntlet of the enemy fire. All the 'O' group vehicles passed through safely except one which burst a tyre and overturned, injuring one passenger. Once the 'O' group members were on their way again the ground either side of the road was cleared by A and C companies. Seven enemy soldiers were killed and four 3 RAR soldiers were wounded. |
||||||||||||||||||||||||||||||||||||||||||||||||||||||||||||||||||||||||||||||||||||||||||||||||||||||||||||||||||||||||||||||||||||||||||||||||||||||||||||||||||||||||||||||||||||||||||||||||||||||||||||||||||||||||||||||||||||||||||||||||||||||||||||||
 |
||||||||||||||||||||||||||||||||||||||||||||||||||||||||||||||||||||||||||||||||||||||||||||||||||||||||||||||||||||||||||||||||||||||||||||||||||||||||||||||||||||||||||||||||||||||||||||||||||||||||||||||||||||||||||||||||||||||||||||||||||||||||||||||
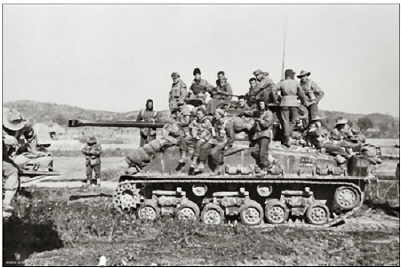
Pakchon, North Korea, 29 October 1950. Australian troops on an American tank halt by the wayside after the capture of Pakchon. (AWM HOBJ1627)
|
||||||||||||||||||||||||||||||||||||||||||||||||||||||||||||||||||||||||||||||||||||||||||||||||||||||||||||||||||||||||||||||||||||||||||||||||||||||||||||||||||||||||||||||||||||||||||||||||||||||||||||||||||||||||||||||||||||||||||||||||||||||||||||||
The 3 RAR withdrawal continued and that night the battalion occupied a position only one mile north of the position it had vacated that morning. During the night of 1/2 January, the remainder of the brigade moved back through 3 RAR and, at 3.00 a.m., the battalion began to withdraw again to an assembly area in Seoul. On 3 January, 3 RAR and the Middlesex again moved north out along the Seoul-Uijongbu road to occupy covering positions on the mountain ridge just north of Seoul. The Argylls guarded the bridges in Seoul itself. Early in the night the last units of the 8th Army moved through the brigade's position and at 11.00 p.m. D Company contacted the enemy advance guard. Enemy probes and attacks were repulsed throughout the rest of the night and the enemy was prevented from re-entering Seoul. At 4.00 p.m. on 4 January, 3 RAR was again ordered to withdraw and, as the last company mounted its trucks, the diggers could see the Chinese moving into the positions they had just vacated. The 3 RAR diggers passed through the Argylls' lines and were the last troops to cross the railway bridge over the Han River south of Seoul before it was blown up. After the Argylls had withdrawn from their covering positions in Seoul (being the last UN troops in the South Korean capital), the 27th British Commonwealth Brigade continued its slow drive southwards, impeded by heavy traffic and refugees, moving towards Toda-Nae, about 100 miles from Seoul, and arriving late at night on 4 January 1951. |
||||||||||||||||||||||||||||||||||||||||||||||||||||||||||||||||||||||||||||||||||||||||||||||||||||||||||||||||||||||||||||||||||||||||||||||||||||||||||||||||||||||||||||||||||||||||||||||||||||||||||||||||||||||||||||||||||||||||||||||||||||||||||||||
 |
||||||||||||||||||||||||||||||||||||||||||||||||||||||||||||||||||||||||||||||||||||||||||||||||||||||||||||||||||||||||||||||||||||||||||||||||||||||||||||||||||||||||||||||||||||||||||||||||||||||||||||||||||||||||||||||||||||||||||||||||||||||||||||||
| After the fall of Seoul the Chinese offensive halted, the bulk of the enemy forces remaining north and east of the Han River. In late January and early February the UN forces had been moving slowly northwards to close the gap between them and the Communist troops.
On 13 February 1951, 3 RAR was located at Yoju on the Han River, fifty miles north-east of Seoul. Contact patrols of company strength were sent along the western of two routes from Yoju to the French battalion and the 23rd US Infantry Regiment at Chipyong-ni (twelve miles north of Yoju). Considerable enemy movement was reported north and north-east of Chipyong-ni, but only very light contact had been made by 3 RAR's patrols. On 14 February, a US mounted reconnaissance force was ambushed and severely cut up on the eastern route to Chipyong-ni. Despite this, 3 RAR's patrols continued to report only very light contact. The Middlesex moved up, crossed the Han, and commenced patrolling forward, with 3 RAR scheduled to follow up. Late in the afternoon the enemy was encountered on Hill 112, an important feature in the centre of the valley and, following artillery and mortar concentrations, the Middlesex successfully assaulted the hill, ejecting the enemy from deep, well-prepared positions. The 3 RAR diggers moved up the left rear of the Middlesex on the high ground west of Toksan-ni and dug in for the night. On 15 February, in the freezing pre-dawn, the Chinese hurled several savage attacks against Hill 112 and at one stage overran the forward company. The men fought their way back to the two supporting companies and, after bitter hand-to-hand fighting, the Middlesex held the position. Later that morning, 3 RAR was to take up the advance with C Company on the right of the road and B Company on the left. To assist C Company, the Middlesex was to take Hill 121, which dominated the valley on the right about 1,400 metres forward of Hill 112. The Middlesex was unable to get to Hill 121 because of heavy mortar and machine-gun fire. No further effort was made to move forward on the right and C Company later moved to the left. B Company secured its first objective unopposed but sighted the enemy in large numbers about a mile to the north and north-east on high ground to the left of the valley that included Hill 195 just south and overlooking Chuam-ni. A and B companies were ordered to capture that feature by attacking from the left. B Company was unable to move forward beyond the forming-up position because of machine-gun fire from higher ground further to the left (Hill 316). Air strikes, artillery and mortar fire failed to locate the various enemy positions and B Company was withdrawn. Late in the afternoon, A Company commenced attacking the spur running south from Hill 195 and came under heavy fire from right, left and front. The fire from the right came from Hill 121 on the other side of the valley. By nightfall A Company had fought most of the way up the steep, icy slopes onto the enemy position, but heavy concentrations of fire pinned the Australians down and A Company was withdrawn under cover of darkness. On the morning of 16 February, the resumption of the attack on Hill 195 was cancelled by brigade headquarters due to enemy troop concentrations a few miles to the east. When D Company's 12 Platoon moved onto the south spur of Hill 316, it again encountered enemy fire from well dug-in positions. During the night of 16/17 February, 12 Platoon remained on the spur. Throughout the day there was little activity and sporadic enemy mortar fire fell in the battalion area. Snow continued to fall. The night was quiet except for an enemy patrol that was quickly dispersed by B Company fire. At dawn on 17 February, 12 Platoon advanced and secured Hill 316 which had been abandoned by the enemy. During the rest of the day the remaining high ground south of the Sanggyo-Don to Chuam-ni road was taken by A, B and C companies. The enemy had clearly abandoned his positions in a hurry as food and weapons had been left behind. On 18 February the Argylls and Middlesex occupied further high ground to the north-east and north-west. At the same time, in the region of Sogu-ri, Headquarters 3 RAR counted at least sixty bodies, twelve jeeps and three light tanks belonging to the ill-fated US reconnaissance force strewn along the road. On 19 February 3 RAR moved into brigade reserve in the Chuam-ni area. During the period 13-18 February, 3 RAR casualties had totalled four killed and sixteen wounded. |
||||||||||||||||||||||||||||||||||||||||||||||||||||||||||||||||||||||||||||||||||||||||||||||||||||||||||||||||||||||||||||||||||||||||||||||||||||||||||||||||||||||||||||||||||||||||||||||||||||||||||||||||||||||||||||||||||||||||||||||||||||||||||||||
| Chipyong-ni (Hill 614), South Korea, February 1951. It is heavy going through knee-deep snow for this stretcher party. (AWM HOBJ2087) | 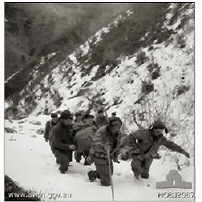 |
|||||||||||||||||||||||||||||||||||||||||||||||||||||||||||||||||||||||||||||||||||||||||||||||||||||||||||||||||||||||||||||||||||||||||||||||||||||||||||||||||||||||||||||||||||||||||||||||||||||||||||||||||||||||||||||||||||||||||||||||||||||||||||||
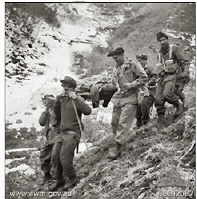 |
South Korea, c. February 1951. Stretcher-bearers in hilly country (near Hill 614) in Central Korea. (AWM HOBJ2082)
|
|||||||||||||||||||||||||||||||||||||||||||||||||||||||||||||||||||||||||||||||||||||||||||||||||||||||||||||||||||||||||||||||||||||||||||||||||||||||||||||||||||||||||||||||||||||||||||||||||||||||||||||||||||||||||||||||||||||||||||||||||||||||||||||
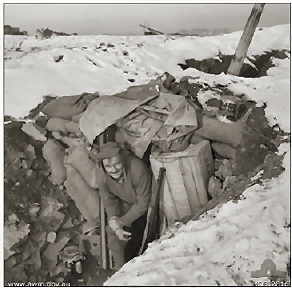
Korea, c. January 1952. A soldier
leaves his snow-covered dugout.
(AWM HOBJ2816) |
 |
|||||||||||||||||||||||||||||||||||||||||||||||||||||||||||||||||||||||||||||||||||||||||||||||||||||||||||||||||||||||||||||||||||||||||||||||||||||||||||||||||||||||||||||||||||||||||||||||||||||||||||||||||||||||||||||||||||||||||||||||||||||||||||||
 |
||||||||||||||||||||||||||||||||||||||||||||||||||||||||||||||||||||||||||||||||||||||||||||||||||||||||||||||||||||||||||||||||||||||||||||||||||||||||||||||||||||||||||||||||||||||||||||||||||||||||||||||||||||||||||||||||||||||||||||||||||||||||||||||
After the action at Chuam-ni, 27 British Commonwealth Brigade advanced northeast into the very mountainous region of central Korea east of Seoul. The capture of Maehwa San, a dominating mountain peak on the right flank of the 9 Corps line of advance, was the culmination of several engagements fought as the brigade advanced from mountain to mountain. Snow and ice covered the whole area, the slopes were so steep that casualties had to be slid down near the crests, and climbers had claw their way up on all fours. The ridge tops were so narrow that the men had to move along them in single file. On 24 February, Hill 614, which had halted the advance for several days, fell to 3 RAR. The summit was finally assaulted when a corporal and two of his men managed to crawl to within grenade range of the Chinese positions above them and then charge into the trenches and bunkers, killing or driving out the defenders and chasing them well down the reverse slope. On 7 March, 3 RAR was again in action, capturing a ridge three miles north of Hill 614. In order to attack this feature, the advancing companies had to descend (usually sliding) into the valley, cross open paddy fields covered by enemy fire, and then scale the slopes on the other side. A Company managed to move about a third of the way up before the enemy fire became so intense that further progress up the exposed slope was impossible. D Company ran the gauntlet of the open paddy fields and tackled a spur a few hundred yards to A Company's right. Five hours later, D Company finally crossed the ridgeline and A Company was able to advance once more. B Company joined the two forward companies to consolidate the position. This action cost 3 RAR eleven killed and twenty-five wounded. |
||||||||||||||||||||||||||||||||||||||||||||||||||||||||||||||||||||||||||||||||||||||||||||||||||||||||||||||||||||||||||||||||||||||||||||||||||||||||||||||||||||||||||||||||||||||||||||||||||||||||||||||||||||||||||||||||||||||||||||||||||||||||||||||
 |
||||||||||||||||||||||||||||||||||||||||||||||||||||||||||||||||||||||||||||||||||||||||||||||||||||||||||||||||||||||||||||||||||||||||||||||||||||||||||||||||||||||||||||||||||||||||||||||||||||||||||||||||||||||||||||||||||||||||||||||||||||||||||||||
The brigade's other battalion secured further mountain features without opposition. On 10 March, 3 RAR again moved forward to occupy hills overlooking the valley at the base of Maehwa San. The mountain consisted of a number of jagged ridges and its peak-at 2,000 feet-rose 1,500 feet above the valley floor at an average slope of 3 in 7. On 11 March, a brigade attack was launched with 3 RAR to attack on the right flank and, on their right, 6 ROK Division was to assault the high ground to the east of Maehwa San. At first light the Argylls and Middlesex advanced north and secured the foothills that dominated the immediate area of the valley. A and C companies of 3 RAR commenced the advance and had crossed the valley floor when A Company came under heavy fire from the village of Chisan to the right. As yet, 6 ROK Division had not attacked and the right flank of the brigade was exposed. A platoon from A Company assaulted the village, killing thirty enemy soldiers and driving out the remainder before heavy mortar and machine-gun fire from the high ground to the east and north-east forced the platoon to withdraw. In the meantime C Company had continued to attack towards its objectives. By mid-afternoon, however, the company was pinned down just below the ridgeline and was to remain there throughout the night. The Canadians and Argylls (who had reached the summit of Maehwa San) were able to secure their objectives without opposition. Early next morning (12 March), C Company moved onto the crest and advanced to its objective. B and D companies moved up and completed the occupation of 3 RAR's objectives, the enemy having pulled out during the night. The next day, 27 British Commonwealth Brigade was relieved by US troops and moved into harbour near Chipyong-ni. |
||||||||||||||||||||||||||||||||||||||||||||||||||||||||||||||||||||||||||||||||||||||||||||||||||||||||||||||||||||||||||||||||||||||||||||||||||||||||||||||||||||||||||||||||||||||||||||||||||||||||||||||||||||||||||||||||||||||||||||||||||||||||||||||
 |
||||||||||||||||||||||||||||||||||||||||||||||||||||||||||||||||||||||||||||||||||||||||||||||||||||||||||||||||||||||||||||||||||||||||||||||||||||||||||||||||||||||||||||||||||||||||||||||||||||||||||||||||||||||||||||||||||||||||||||||||||||||||||||||
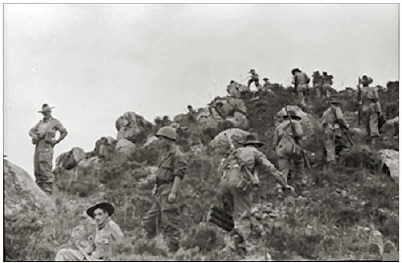
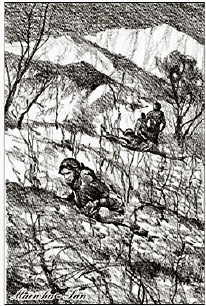
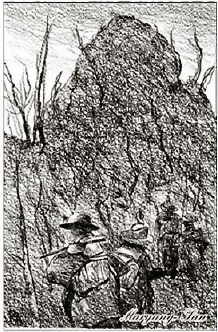
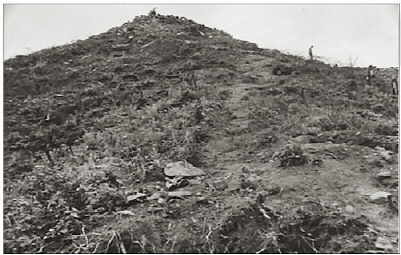
| Salmon Hill, Korea c. 1951. Australian soldiers make their way in single file along a track leading up a steep conical hill. Most of the soldiers are carrying their weapons over their shoulders, while the man second from bottom is carrying a radio set on his back. Some patches of late winter snow lie on the ground among the trees and, at right, snow lies in sheets on the mountains in the background. (AWM P02201.135) |
||||||||||||||||||||||||||||||||||||||||||||||||||||||||||||||||||||||||||||||||||||||||||||||||||||||||||||||||||||||||||||||||||||||||||||||||||||||||||||||||||||||||||||||||||||||||||||||||||||||||||||||||||||||||||||||||||||||||||||||||||||||||||||||
 |
||||||||||||||||||||||||||||||||||||||||||||||||||||||||||||||||||||||||||||||||||||||||||||||||||||||||||||||||||||||||||||||||||||||||||||||||||||||||||||||||||||||||||||||||||||||||||||||||||||||||||||||||||||||||||||||||||||||||||||||||||||||||||||||
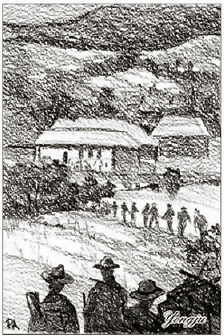
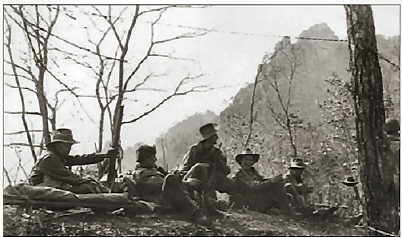
| Australian soldiers relax as they are relieved on Salmon Hill by Korean troops of the 6th Republic of Korea (ROK) Division (extreme right). (AWM P01813.442) |
||||||||||||||||||||||||||||||||||||||||||||||||||||||||||||||||||||||||||||||||||||||||||||||||||||||||||||||||||||||||||||||||||||||||||||||||||||||||||||||||||||||||||||||||||||||||||||||||||||||||||||||||||||||||||||||||||||||||||||||||||||||||||||||
 |
||||||||||||||||||||||||||||||||||||||||||||||||||||||||||||||||||||||||||||||||||||||||||||||||||||||||||||||||||||||||||||||||||||||||||||||||||||||||||||||||||||||||||||||||||||||||||||||||||||||||||||||||||||||||||||||||||||||||||||||||||||||||||||||
On 25 March 1951, 27 British Commonwealth Brigade came under command of 24 US Infantry Division operating on the central front. At this time, the enemy opposition was desultory. However, on 15 and 16 April a brisk fight developed as the brigade was taking two important hills that were intended to form part of a UN line just north of the 38th Parallel. Shortly afterwards, the brigade moved once more into corps reserve in the Kapyong River valley. Their position in the new line was occupied by troops from 6 ROK Division. At last light on 22 April, the Chinese commenced a full-scale offensive in three main thrusts on the western, central and eastern fronts. On the central front, 6 ROK Division gave way, but the flanking US divisions turned their inner flanks back and 27 British Commonwealth Brigade and a US regiment moved in to plug the gap. On 23 April, 3 RAR took up positions covering a ford and road from the north into the Kapyong valley. B Company was given the task of holding a low ridge between the river and the road, and the other rifle companies were allocated positions on high ground to the east. The Canadians were across the valley to the west and the Middlesex in the valley behind and between the two forward battalions. A US heavy tank battalion was in support and, by 11.00 p.m. that night, the New Zealand artillery had returned to the brigade from supporting 6 ROK Division. As darkness fell South Korean troops began to flood back through the battalion area destroying telephone lines and masking the advanced elements of the Chinese army. At 10.00 p.m. a platoon of heavy tanks was fired on by the Chinese north of the B Company position. The tanks withdrew to the battalion area. |
||||||||||||||||||||||||||||||||||||||||||||||||||||||||||||||||||||||||||||||||||||||||||||||||||||||||||||||||||||||||||||||||||||||||||||||||||||||||||||||||||||||||||||||||||||||||||||||||||||||||||||||||||||||||||||||||||||||||||||||||||||||||||||||
 |
||||||||||||||||||||||||||||||||||||||||||||||||||||||||||||||||||||||||||||||||||||||||||||||||||||||||||||||||||||||||||||||||||||||||||||||||||||||||||||||||||||||||||||||||||||||||||||||||||||||||||||||||||||||||||||||||||||||||||||||||||||||||||||||
Some of the leading enemy soldiers continued their advance down the road and across the ford and were able to attack Headquarters Company and threaten Brigade Headquarters. Probing attacks around the battalion positions continued throughout the night and strong assaults were made on A Company, where a platoon position was overrun, only to be retaken at daylight. At about 3.00 a.m., B Company came under heavy attack, although the position was still intact at dawn. At first light, Brigade Headquarters was withdrawn under fire to the Middlesex area and B Company was ordered to leave the position which had been so well defended during the night, and join the other rifle companies on the higher ground. B Company picked up several dozen prisoners on its move to the high ground and later was sent to clear a general withdrawal route to the south. After a three-hour battle, a route was cleared along the high ground to the east of the river, the ford remaining in Chinese hands. D Company on the right flank and on the highest ground came under intense attack at 7.00 a.m. and this lasted intermittently throughout the day. The enemy continued to suffer heavy casualties and made little progress although a platoon had to be withdrawn to strengthen the company defences. D Company then had a good view of an enemy attack with mortar support against the vacated platoon area and was able to inflict casualties on the attacking troops. C Company, the rear company on the defended hills, generally had only fairly isolated enemy infiltration to counter. That night the battalion was ordered to withdraw to the Middlesex positions which the Australians achieved with close artillery and tank support. Casualties suffered by 3 RAR amounted to thirty-one killed, fifty-eight wounded and three missing. |
||||||||||||||||||||||||||||||||||||||||||||||||||||||||||||||||||||||||||||||||||||||||||||||||||||||||||||||||||||||||||||||||||||||||||||||||||||||||||||||||||||||||||||||||||||||||||||||||||||||||||||||||||||||||||||||||||||||||||||||||||||||||||||||
 |
||||||||||||||||||||||||||||||||||||||||||||||||||||||||||||||||||||||||||||||||||||||||||||||||||||||||||||||||||||||||||||||||||||||||||||||||||||||||||||||||||||||||||||||||||||||||||||||||||||||||||||||||||||||||||||||||||||||||||||||||||||||||||||||
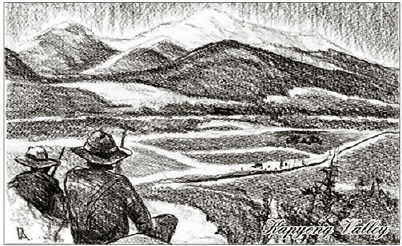
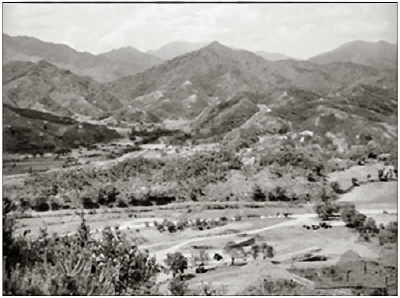
| Kapyong, South Korea, June 1952. A panoramic view from the left of an Australian position at Kapyong.
(AWM HOBJ3147) |
||||||||||||||||||||||||||||||||||||||||||||||||||||||||||||||||||||||||||||||||||||||||||||||||||||||||||||||||||||||||||||||||||||||||||||||||||||||||||||||||||||||||||||||||||||||||||||||||||||||||||||||||||||||||||||||||||||||||||||||||||||||||||||||
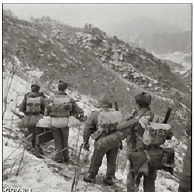 |
Korea c. 1951. Walking over snow-covered mountains, an Australian mortar fire control team moves to a forward position to bring support to a patrol. (AWM HOBJ2106) |
|||||||||||||||||||||||||||||||||||||||||||||||||||||||||||||||||||||||||||||||||||||||||||||||||||||||||||||||||||||||||||||||||||||||||||||||||||||||||||||||||||||||||||||||||||||||||||||||||||||||||||||||||||||||||||||||||||||||||||||||||||||||||||||
| Korea, January 1953. Diggers enjoy the sunshine by their section command post.
(AWM HOBJ3956) |
 |
|||||||||||||||||||||||||||||||||||||||||||||||||||||||||||||||||||||||||||||||||||||||||||||||||||||||||||||||||||||||||||||||||||||||||||||||||||||||||||||||||||||||||||||||||||||||||||||||||||||||||||||||||||||||||||||||||||||||||||||||||||||||||||||
 |
||||||||||||||||||||||||||||||||||||||||||||||||||||||||||||||||||||||||||||||||||||||||||||||||||||||||||||||||||||||||||||||||||||||||||||||||||||||||||||||||||||||||||||||||||||||||||||||||||||||||||||||||||||||||||||||||||||||||||||||||||||||||||||||
In late September 1951, 28 British Commonwealth Brigade, as part of the 1st Commonwealth Division, was given the task of capturing the Kowang San area forward of the right flank of the division held by 25 Canadian Brigade, their extreme right flank resting on the Imjin River. The 28th British Commonwealth Brigade comprised 3 RAR, the King's Own Scottish Borderers (KOSB) and the King's Shropshire Light Infantry (KSLI). The Royal Northumberland Fusiliers (RNF) was under command for the attack. On 2 October 1951, 3 RAR (less D Company) moved forward through the positions held by the Royal 22nd Regiment (R22R). The enemy did not notice this forward concentration, which was very carefully executed. C Company had advanced to a position that had periodically been held by a small enemy force 1,500 metres in front of the Canadian lines and about the same distance north-east of the northern slopes of the enemy-held Hill 355. B Company was a few hundred metres behind C Company. During the afternoon, C Company came under heavy shelling but suffered only one soldier wounded. At 3.00 a.m. on 3 October, B Company moved north about 2,000 metres across an open valley under cover of darkness with the intention of taking Point 199. A Company moved up behind C Company. At 8.00 a.m., B Company had gained the high ground north of the valley and commenced patrolling the short distance to the west to Point 199, which the diggers took with the loss of three wounded. At 10.00 a.m., A Company took over Point 199 and B Company returned to its former position behind C Company. Tanks and a section of medium machine-guns moved up to Point 199 and directed their fire onto the northern slopes of Hill 355 (Kowang San) in support of the KOSB attack on that feature. D Company returned to 3 RAR (having previously been detached to the Canadian Brigade) and was placed in position between C Company and KOSB, attacking the eastern end of Hill 355. During the day C Company had again been shelled, as had been B Company to its rear. At last light KOSB had not completed its attack on Hill 355 and the decision was taken that 3 RAR would assist the next day. On 4 October, C Company attacked towards the northern spurs of Hill 355 in an effort to take out the enemy positions causing trouble to the right flank of the KOSB battle lines. By 9.15 a.m., C Company had closed with the enemy and an hour later the diggers had fought their way to their main objectives. Two more hours of close combat cleared the feature, providing considerable assistance to the KOSB in the final stages of its assault. Eleven C Company diggers were wounded, one of whom later died. The enemy left behind thirteen dead and three prisoners were taken. The KSLI had advanced on the south side of Hill 355 securing the brigade's left flank. |
||||||||||||||||||||||||||||||||||||||||||||||||||||||||||||||||||||||||||||||||||||||||||||||||||||||||||||||||||||||||||||||||||||||||||||||||||||||||||||||||||||||||||||||||||||||||||||||||||||||||||||||||||||||||||||||||||||||||||||||||||||||||||||||
 |
||||||||||||||||||||||||||||||||||||||||||||||||||||||||||||||||||||||||||||||||||||||||||||||||||||||||||||||||||||||||||||||||||||||||||||||||||||||||||||||||||||||||||||||||||||||||||||||||||||||||||||||||||||||||||||||||||||||||||||||||||||||||||||||
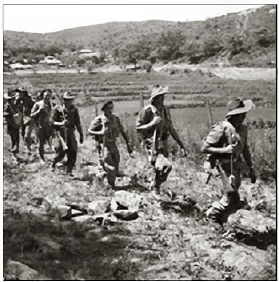
North Korea. Australian soldiers return from a patrol in no man's land. (AWM HOBJ2283)
|
||||||||||||||||||||||||||||||||||||||||||||||||||||||||||||||||||||||||||||||||||||||||||||||||||||||||||||||||||||||||||||||||||||||||||||||||||||||||||||||||||||||||||||||||||||||||||||||||||||||||||||||||||||||||||||||||||||||||||||||||||||||||||||||
 |
||||||||||||||||||||||||||||||||||||||||||||||||||||||||||||||||||||||||||||||||||||||||||||||||||||||||||||||||||||||||||||||||||||||||||||||||||||||||||||||||||||||||||||||||||||||||||||||||||||||||||||||||||||||||||||||||||||||||||||||||||||||||||||||
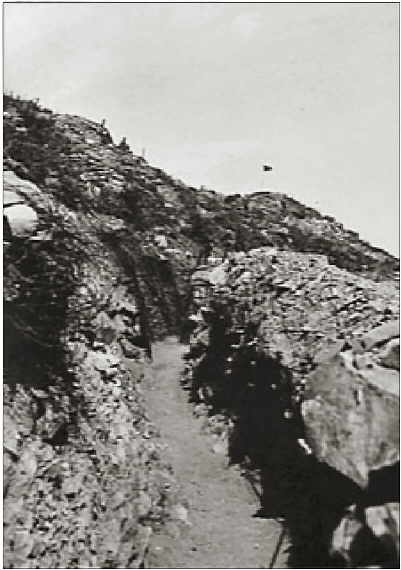
Majon'ni, Korea, 1953.
Communication trenches on the reverse slopes of Feature 355. (AWM 157569) |
||||||||||||||||||||||||||||||||||||||||||||||||||||||||||||||||||||||||||||||||||||||||||||||||||||||||||||||||||||||||||||||||||||||||||||||||||||||||||||||||||||||||||||||||||||||||||||||||||||||||||||||||||||||||||||||||||||||||||||||||||||||||||||||
 |
||||||||||||||||||||||||||||||||||||||||||||||||||||||||||||||||||||||||||||||||||||||||||||||||||||||||||||||||||||||||||||||||||||||||||||||||||||||||||||||||||||||||||||||||||||||||||||||||||||||||||||||||||||||||||||||||||||||||||||||||||||||||||||||
An observation post at the summit of Hill 355 ('Little Gibraltar') Korea.
(AWM 044760) |
||||||||||||||||||||||||||||||||||||||||||||||||||||||||||||||||||||||||||||||||||||||||||||||||||||||||||||||||||||||||||||||||||||||||||||||||||||||||||||||||||||||||||||||||||||||||||||||||||||||||||||||||||||||||||||||||||||||||||||||||||||||||||||||
 |
||||||||||||||||||||||||||||||||||||||||||||||||||||||||||||||||||||||||||||||||||||||||||||||||||||||||||||||||||||||||||||||||||||||||||||||||||||||||||||||||||||||||||||||||||||||||||||||||||||||||||||||||||||||||||||||||||||||||||||||||||||||||||||||
The second phase of the brigade attack commenced on 5 October. The final objective was to have been Hill 317 (Maryang San), which lay approximately 2,500 metres north of Hill 355. The 3 RAR attack would come from the east and the RNF would attack from the south-west. However, the RNF met very determined opposition on an intermediate objective, Hill 217, and was unable to move forward. At 4.45 a.m., B and D companies moved further north across another valley. The anti-tank platoon crossed the Imjin and took up a position still further north to protect the right flank of the attacking companies whose advance from then on was to be towards the west through a series of enemy-held objectives with a final assault on Hill 317. In the initial stages of the advance, B Company, which led the attack on the first objective, drifted to the right of the line of advance having lost direction in the heavy morning mist and thick timber. D Company continued forward and when the mist finally lifted found itself within grenade range of the enemy. With tank and artillery fire support D Company cleared the first objective and continued to press the attack along the high ground successfully assaulting the various enemy positions in its path. At 4.00 p.m., the last intermediate objective fell to D Company. The enemy had been deeply entrenched and very well equipped with heavy automatics. A platoon from B Company moved up to assist to clear and consolidate the feature. Enemy casualties counted thus far had been 98 killed and forty taken prisoner, while a large number had been wounded. In the meantime the RNF soldiers had reached Hill 217. Although the pressure of their attack was maintained, they were unable to gain the summit of the hill. A Company, 3 RAR, had been creating a diversion for B and D companies by attacking along a spur leading onto the final objective (Hill 317) from the south-west, meeting stiff opposition. As B and D companies had progressed, C Company had moved up behind them, and by 5.00 p.m. the last intermediate assault on Hill 317 had secured the feature. Ten prisoners were taken while C Company suffered no casualties. The pressure maintained by the RNF to the south-east and A Company's diversionary attack coupled with D Company's rapid advance during the day and the very close tank and artillery support, had outmanoeuvred the enemy. A Company's attacks had continued against heavy opposition and slowly the enemy had been forced back until a platoon from A Company had been able to join C Company in the consolidation of Hill 317. A Company's two other platoons withdrew to the rear. A Company had been the target of heavy shelling during the whole of its advance and shells again rained down on the diggers as they withdrew. On 6 October a platoon from C Company moved forward of Hill 317 to secure a position so as to add depth to the defence. The RNF soldiers continued their attack on Hill 217. Although at one stage they were able to gain a toe-hold, they were unable to clear the hill in the face of very strong opposition. The RNF suffered 100 casualties during the two days' fighting. On 7 October, 3 RAR was directed to take Hill 217. To achieve this, a feature known as 'The Hinge', which dominated Hill 217 from the north, had to be taken. 'The Hinge' was just east of Hill 317 and C Company's forward platoon. B Company's two leading platoons gained the summit, but company headquarters and the reserve platoon, moving up to join them, were counter-attacked from both flanks. After a fierce fight at close quarters, the enemy melted into the trees and long grass. For the remainder of the day, B Company on 'The Hinge' and C Company on Hill 317 were subjected to intense bombardment. The anti-tank platoon and the assault pioneer platoon reinforced C Company while a platoon from C Company moved forward to assist B Company. At 9.00 p.m., 'The Hinge' and Hill 317 were subjected to a tremendous concentration of enemy shelling for about forty-five minutes followed immediately by strong counterattacks. A heavy mist hung over the area and this assisted the enemy to reach and at times penetrate the company perimeters. The attacks continued throughout the night until the enemy finally gave up at 5.00 a.m. At first light, when the enemy stretcher- bearers were permitted to approach and carry away their casualties, they found 120 enemy dead and wounded lying around the defences. |
||||||||||||||||||||||||||||||||||||||||||||||||||||||||||||||||||||||||||||||||||||||||||||||||||||||||||||||||||||||||||||||||||||||||||||||||||||||||||||||||||||||||||||||||||||||||||||||||||||||||||||||||||||||||||||||||||||||||||||||||||||||||||||||
 |
||||||||||||||||||||||||||||||||||||||||||||||||||||||||||||||||||||||||||||||||||||||||||||||||||||||||||||||||||||||||||||||||||||||||||||||||||||||||||||||||||||||||||||||||||||||||||||||||||||||||||||||||||||||||||||||||||||||||||||||||||||||||||||||
Around Hill 159. Four diggers wait in a trench for the word to move out on a night patrol.
(AWM HOBJ4384)
|
||||||||||||||||||||||||||||||||||||||||||||||||||||||||||||||||||||||||||||||||||||||||||||||||||||||||||||||||||||||||||||||||||||||||||||||||||||||||||||||||||||||||||||||||||||||||||||||||||||||||||||||||||||||||||||||||||||||||||||||||||||||||||||||
At 9.00 a.m. on 8 October, two companies from the KOSB came under command of 3 RAR and relieved the Australians on 'The Hinge' and Maryang San. The RNF once more advanced on Hill 217 and was able to occupy the feature without opposition, meeting patrols from the KOSB on 'The Hinge'. At 11.00 a.m. on 9 October, the KOSB assumed command of the Maryang San area. During this operation, 3 RAR had accounted for two full-strength Chinese battalions. Accurate figures show 283 counted enemy dead and fifty taken prisoner. This number does not include casualties from artillery, tank and medium machine-gun fire, which would have been considerable. The enemy fired accurate and sustained artillery concentrations, which was a new experience for 3 RAR. The night attack by the enemy was well controlled and occurred immediately after a heavy artillery concentration. Bugles were not used, nor was any movement heard before the attack began. In total, 3 RAR suffered twenty killed and 104 wounded. Fifteen of the wounded had remained on duty. |
||||||||||||||||||||||||||||||||||||||||||||||||||||||||||||||||||||||||||||||||||||||||||||||||||||||||||||||||||||||||||||||||||||||||||||||||||||||||||||||||||||||||||||||||||||||||||||||||||||||||||||||||||||||||||||||||||||||||||||||||||||||||||||||
 |
||||||||||||||||||||||||||||||||||||||||||||||||||||||||||||||||||||||||||||||||||||||||||||||||||||||||||||||||||||||||||||||||||||||||||||||||||||||||||||||||||||||||||||||||||||||||||||||||||||||||||||||||||||||||||||||||||||||||||||||||||||||||||||||
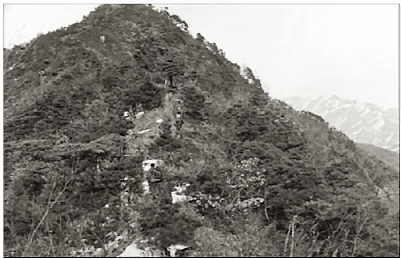
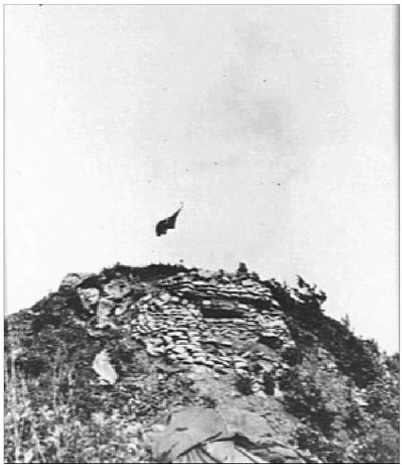
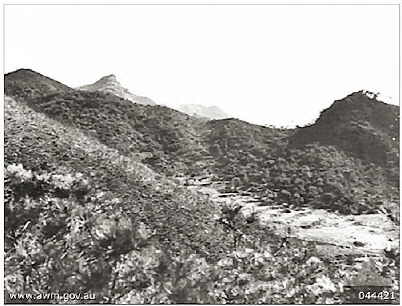
Korea, 1951. Hill 317 (Maryang San)
Captured during Operation Commando. (AWM 044421 |
||||||||||||||||||||||||||||||||||||||||||||||||||||||||||||||||||||||||||||||||||||||||||||||||||||||||||||||||||||||||||||||||||||||||||||||||||||||||||||||||||||||||||||||||||||||||||||||||||||||||||||||||||||||||||||||||||||||||||||||||||||||||||||||
"He called out a warning that he was bringing in a badly wounded man. The battle restarted and I did not see him again until we drove the Chinese out of the Platoon position after dawn. Both of them were dead. He had his arm around his friend where he was half carrying him. Most of his own hand had been blown off and he had his handkerchief wrapped around it. He died helping his mate and warning his friends." George Harris |
||||||||||||||||||||||||||||||||||||||||||||||||||||||||||||||||||||||||||||||||||||||||||||||||||||||||||||||||||||||||||||||||||||||||||||||||||||||||||||||||||||||||||||||||||||||||||||||||||||||||||||||||||||||||||||||||||||||||||||||||||||||||||||||
 |
||||||||||||||||||||||||||||||||||||||||||||||||||||||||||||||||||||||||||||||||||||||||||||||||||||||||||||||||||||||||||||||||||||||||||||||||||||||||||||||||||||||||||||||||||||||||||||||||||||||||||||||||||||||||||||||||||||||||||||||||||||||||||||||
 |
||||||||||||||||||||||||||||||||||||||||||||||||||||||||||||||||||||||||||||||||||||||||||||||||||||||||||||||||||||||||||||||||||||||||||||||||||||||||||||||||||||||||||||||||||||||||||||||||||||||||||||||||||||||||||||||||||||||||||||||||||||||||||||||
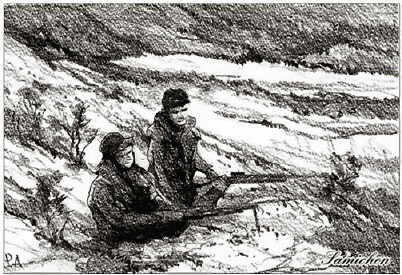
On 9 July 1953, 2 RAR relieved the King's Regiment on the left flank of 1 Commonwealth Division. At the time of the battle of The Samichon, D Company held the high feature known as 'The Hook', C Company was on Hill 121 to the south and A Company on high ground to the east of D Company. B Company was in reserve behind C Company. The anti-tank platoon, under command of D Company, occupied the saddle between D and C companies. On the night of 24/25 July, fighting broke out on the 2 RAR front when Hill 121-held by C Company-was probed by the enemy. At the same time enemy forces attacked the 7th US Marine Regiment on 2 RAR's left. An enemy force of about fifty advanced on D Company occupying 'The Hook', but a forward standing patrol was able to direct tank and artillery fire which dispersed the force. Enemy artillery and mortar concentrations on 'The Hook', the 2 RAR mortar base- plate and Hill 121 heralded an enemy advance. At 8.50 p.m., enemy soldiers reached the front of C Company's left-hand position and infiltrated between C Company and the US Marines on Hill 111. A fierce firefight ensued and the enemy withdrew. A Company of the Durham Light Infantry (DLI) moved up behind B Company and came under command of 2 RAR. At 10.03 p.m. the enemy artillery intensified once more. The position on Hill 111 became confused and at 11.25 p.m. the enemy again tried to take Hill 121. A clash developed involving grenades and small arms, but the attack petered out as the enemy had sustained heavy casualties. At this stage it was estimated that the objectives of the enemy attack were 'Boulder City' and Hill 111 in the US sector and Hill 121. At 4.00 a.m. another fight developed on Hill 111. By 5.30 p.m. the position was again fully in Marine hands. A section of 2 RAR medium machine-gun platoon on Hill 111 endeavoured to coax an enemy trapped in a bunker to surrender, but eventually was forced to kill him. During the night 2 RAR suffered two killed and fourteen wounded. A steady barrage of enemy shelling continued throughout the day. At 9.00 p.m. on 25 July, about twenty enemy soldiers again tried to move up to 'The Hook'-held by D Company-but were driven off by a section patrol that killed at least one of the party. No casualties were suffered by the 2 RAR patrol; however, around 1.30 a.m., one digger from the patrol was killed and another wounded by enemy mortar fire. The patrol was recalled. At 11.00 p.m., enemy artillery and mortar fire intensified to thirty rounds per minute accompanied by considerable movement on the left. Forty minutes later a determined attack by the enemy penetrated the left of 2 RAR's position and fighting was also reported on Hill 111. After a close contact fight lasting around an hour the enemy was driven back leaving 35 dead on the feature and another 35 either killed or wounded, counted around C Company's perimeter on Hill 121. A further estimate of 300 enemy dead was made on Hill 111-the US Marine position. Casualties taken by 2 RAR on Hill 111 during this action totalled five wounded. |
||||||||||||||||||||||||||||||||||||||||||||||||||||||||||||||||||||||||||||||||||||||||||||||||||||||||||||||||||||||||||||||||||||||||||||||||||||||||||||||||||||||||||||||||||||||||||||||||||||||||||||||||||||||||||||||||||||||||||||||||||||||||||||||
 |
||||||||||||||||||||||||||||||||||||||||||||||||||||||||||||||||||||||||||||||||||||||||||||||||||||||||||||||||||||||||||||||||||||||||||||||||||||||||||||||||||||||||||||||||||||||||||||||||||||||||||||||||||||||||||||||||||||||||||||||||||||||||||||||
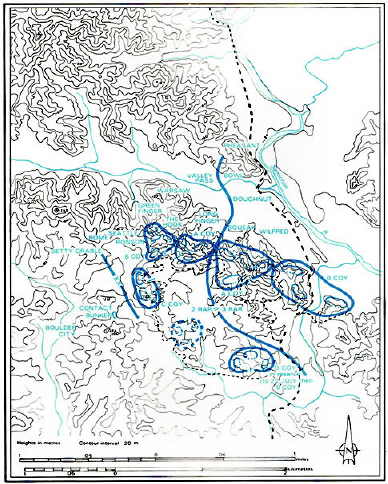
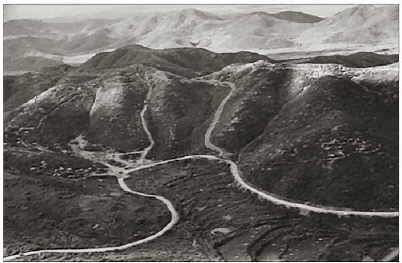
Majon'ni, Korea, 1953.
Aerial view of roads in and around The Hook and its defences. (AWM 157750) |
||||||||||||||||||||||||||||||||||||||||||||||||||||||||||||||||||||||||||||||||||||||||||||||||||||||||||||||||||||||||||||||||||||||||||||||||||||||||||||||||||||||||||||||||||||||||||||||||||||||||||||||||||||||||||||||||||||||||||||||||||||||||||||||
 |
||||||||||||||||||||||||||||||||||||||||||||||||||||||||||||||||||||||||||||||||||||||||||||||||||||||||||||||||||||||||||||||||||||||||||||||||||||||||||||||||||||||||||||||||||||||||||||||||||||||||||||||||||||||||||||||||||||||||||||||||||||||||||||||
Majon'ni, Korea, 1953. Sandbagged command post area on The Hook. (AWM 157713)
|
||||||||||||||||||||||||||||||||||||||||||||||||||||||||||||||||||||||||||||||||||||||||||||||||||||||||||||||||||||||||||||||||||||||||||||||||||||||||||||||||||||||||||||||||||||||||||||||||||||||||||||||||||||||||||||||||||||||||||||||||||||||||||||||
At 1.00 a.m., D Company, 3 RAR, moved up to a position behind B Company and came under command of 2 RAR. A Company, DLI, was warned out, but did not move up. Exchanges of small arms fire continued and, at 3.00 a.m., activity along the whole front subsided and the artillery shelling subsided. D Company, 3 RAR, left to rejoin the battalion. At daylight on 26 July, a steady stream of enemy casualties was seen evacuating Hill 111 and crossing the paddy fields from the left of 2 RAR. The stretcher parties were not engaged. One group of twenty enemy soldiers attempting to withdraw was engaged by the anti-tank platoon and six casualties were recorded. 2 RAR's casualties for the night amounted to three killed and ten wounded bringing the total to five killed and twenty-four wounded. On the night of 26/27 July, further light attacks occurred but were easily repulsed and the next day numerous enemy stretcher parties were once again allowed to pass unmolested. Incoming artillery and mortar fire declined from 43,000 rounds in the previous 48-hour period to 54 mixed rounds. There were no casualties. At 10.00 a.m. the Armistice was signed, to take effect from 10.00 p.m. Orders to cease fire were received at 10.42 a.m. That night, a patrol from the anti-tank platoon reported activity on the enemy- defended hills and first light showed that the enemy had decorated his forward position with colourful flags and paper. Propaganda and music blared across the valley. The enemy intimated his willingness to exchange gifts and some intrepid troops accepted. Taking advantage of daylight and the cease-fire, the enemy continued to clear the battlefield of casualties and many funeral pyres were seen burning. The forward areas around 'The Hook' were flooded with sightseers and controlling this unauthorised intrusion proved difficult. Public relations personnel, war correspondents and the other press representatives were particularly attracted to the area. The 2 RAR diggers began dismantling their defensive positions prior to withdrawing behind the demilitarised cease-fire line. |
||||||||||||||||||||||||||||||||||||||||||||||||||||||||||||||||||||||||||||||||||||||||||||||||||||||||||||||||||||||||||||||||||||||||||||||||||||||||||||||||||||||||||||||||||||||||||||||||||||||||||||||||||||||||||||||||||||||||||||||||||||||||||||||
 |
||||||||||||||||||||||||||||||||||||||||||||||||||||||||||||||||||||||||||||||||||||||||||||||||||||||||||||||||||||||||||||||||||||||||||||||||||||||||||||||||||||||||||||||||||||||||||||||||||||||||||||||||||||||||||||||||||||||||||||||||||||||||||||||
| Majon'ni, Korea, 1953. Green Finger observation post, looking from Green Finger into The Hook positions. The track was used by the Chinese during raids in The Hook area and was also a route out for the Australian fighting patrols into the valley. (AWM 157758) |
||||||||||||||||||||||||||||||||||||||||||||||||||||||||||||||||||||||||||||||||||||||||||||||||||||||||||||||||||||||||||||||||||||||||||||||||||||||||||||||||||||||||||||||||||||||||||||||||||||||||||||||||||||||||||||||||||||||||||||||||||||||||||||||
 |
||||||||||||||||||||||||||||||||||||||||||||||||||||||||||||||||||||||||||||||||||||||||||||||||||||||||||||||||||||||||||||||||||||||||||||||||||||||||||||||||||||||||||||||||||||||||||||||||||||||||||||||||||||||||||||||||||||||||||||||||||||||||||||||
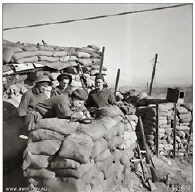
| Yesterday they had their heads well down against a torrent of incoming fire, today after the cease-fire, these 2 RAR soldiers start carrying stores out. (AWM HOBJ4489) |
||||||||||||||||||||||||||||||||||||||||||||||||||||||||||||||||||||||||||||||||||||||||||||||||||||||||||||||||||||||||||||||||||||||||||||||||||||||||||||||||||||||||||||||||||||||||||||||||||||||||||||||||||||||||||||||||||||||||||||||||||||||||||||||
 |
| The 3 RAR Internet site gratefully acknowledges the assistance of 101 design of Wollongong. www.101design.com.au |